Cybersecurity
Vulnerability Scanning With Nessus
I created this home lab as a way to gain experience doing vulnerability scans using Nessus Essentials by Tenable. Nessus is a freemium vulnerability scanning tool that allows one to scan the devices on their network to find and remedy security vulnerabilities. With this lab I wanted to explain/show how I set everything up and how and why I ran through different scan types. I also performed some basic remediations and reporting.
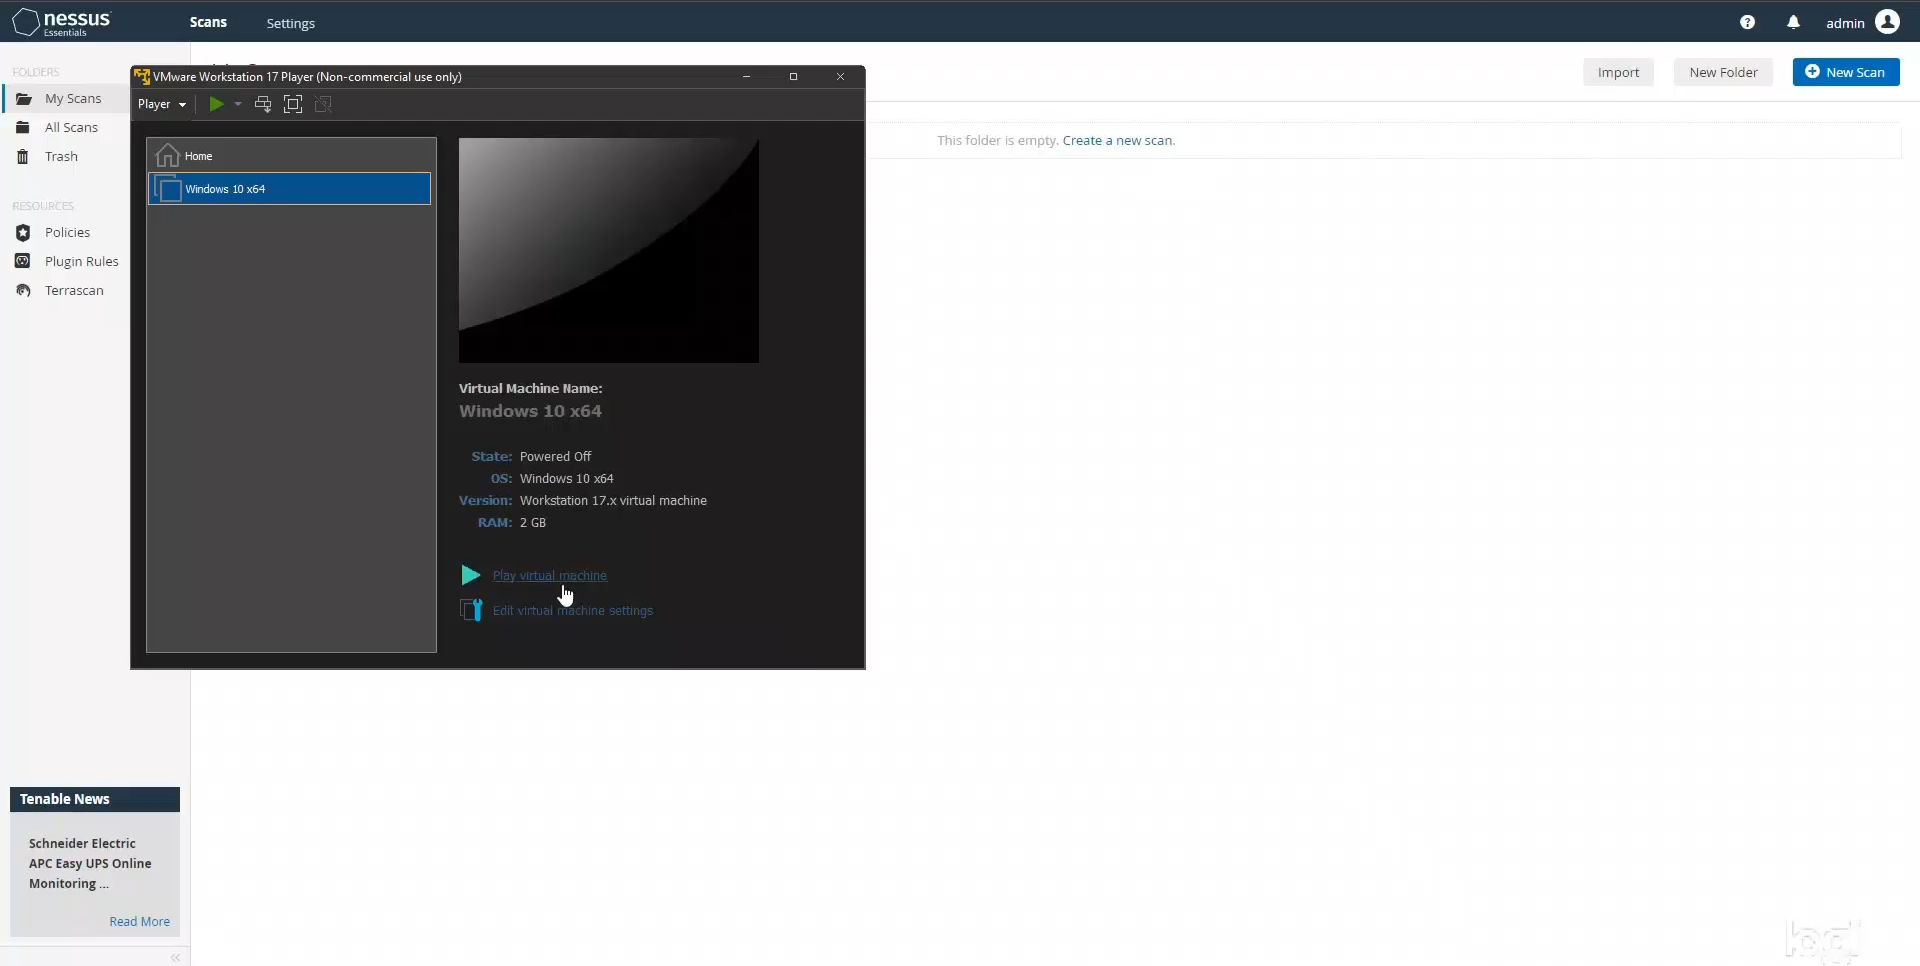
The first thing that I did was install and set up Nessus on my main machine, and I created a new Windows 10 virtual machine (VM) to scan using VMware Workstation Player.
I was going to show the creation and basic setup of the virtual machine itself, but decided to cut that part out since that isn’t really the point of this lab. However, I will show the steps taken to set up the virtual machine for credentialed scans. But first I’m going to prepare the lab environment for scanning by disabling the firewall on the virtual machine to allow access from the remote scanning tool.
Preparing the lab environment for scanning
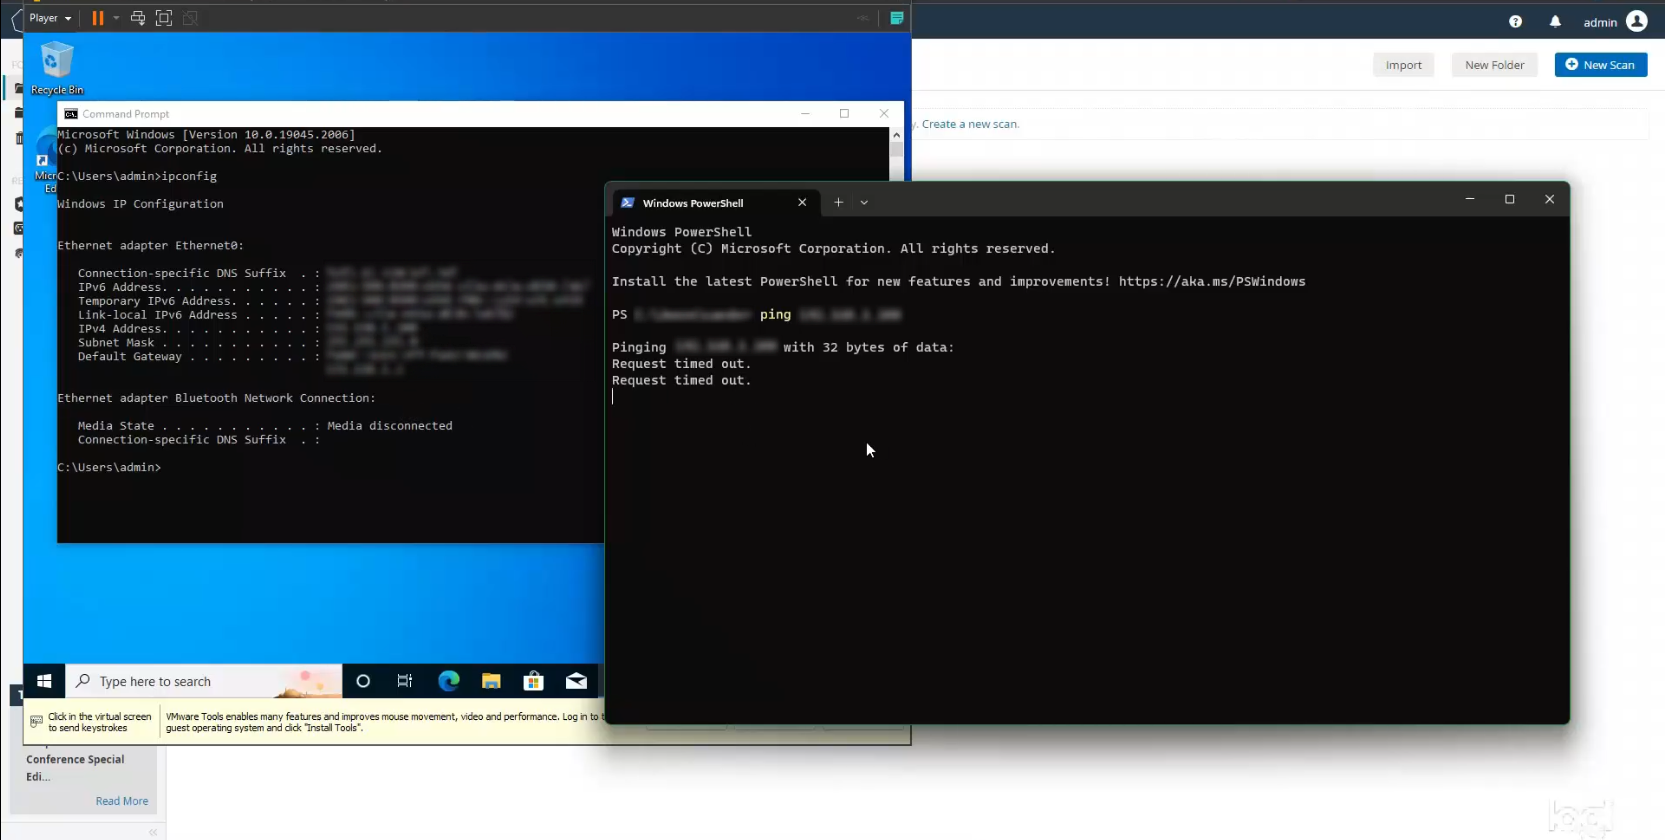
The first thing I did was to prepare the lab environment for scanning by disabling the firewall on the VM. I began by opening Windows Command Prompt on the VM and typing ipconfig to grab my IP address for the VM. I then opened Command Prompt on my main machine and typed ping followed by the VM IP address that I just grabbed. As expected, I received multiple lines stating that the request timed out because the firewall on my VM was blocking the incoming traffic.
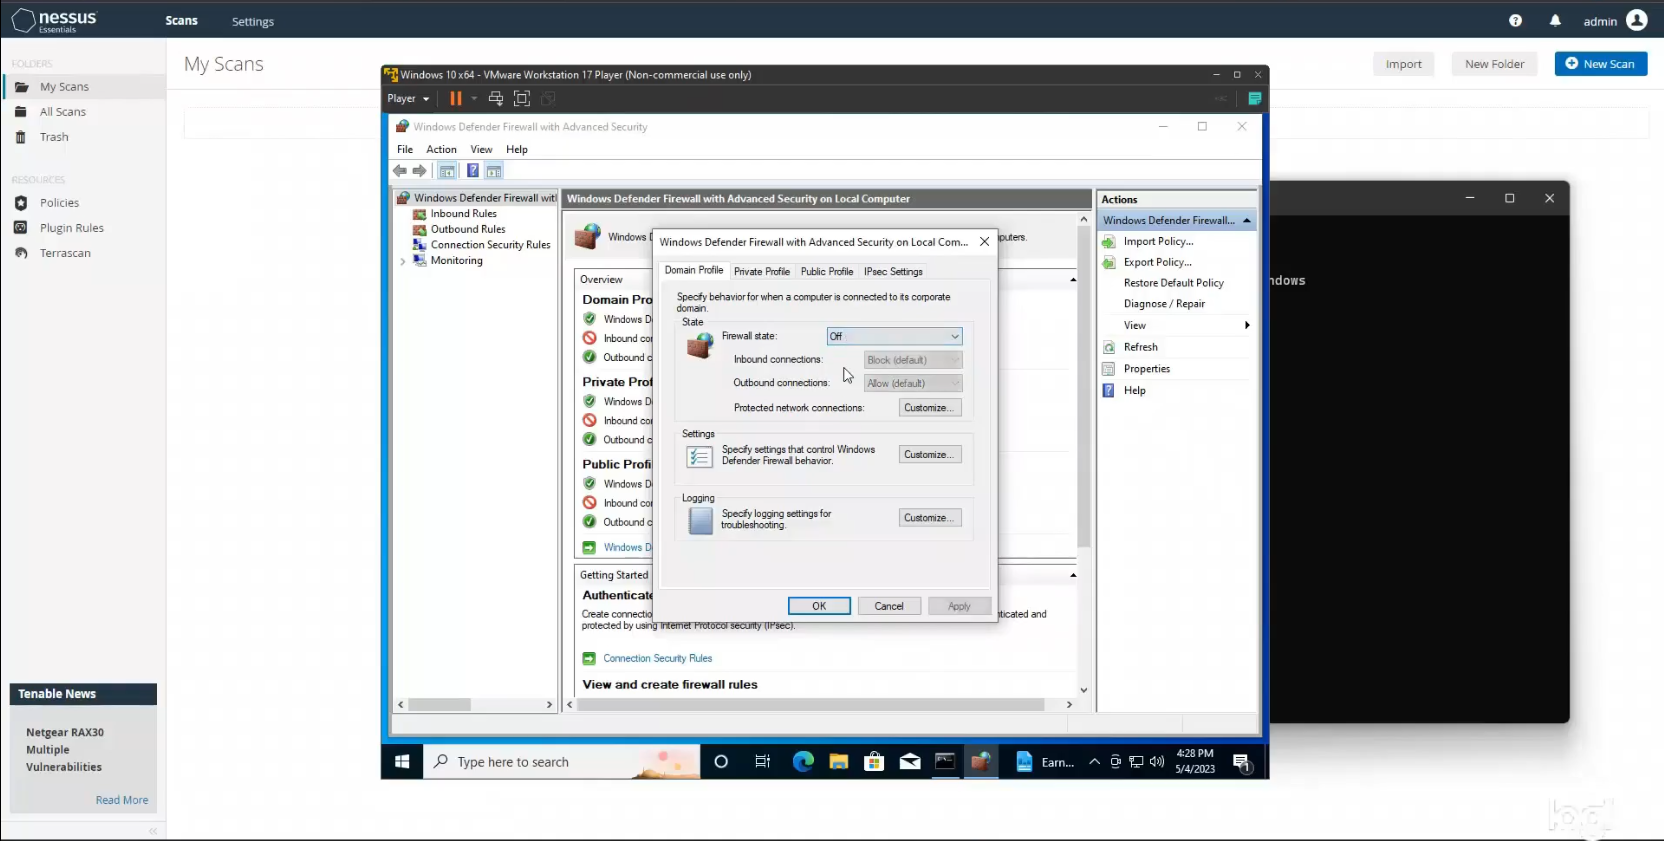
I then went back into the VM and typed in wf.msc to open up the Windows Defender firewall configurations. Under the Domain Profile tab I selected Off for the firewall state. Ditto for the Private Profile and Public Profile settings. After applying those settings I received a Windows notification stating that my firewall protection was off.
At that point I pinged my VM again from the command line of my main machine and received replies showing that packets were no longer being blocked by the firewall. Good to go.
Host Discovery Scan
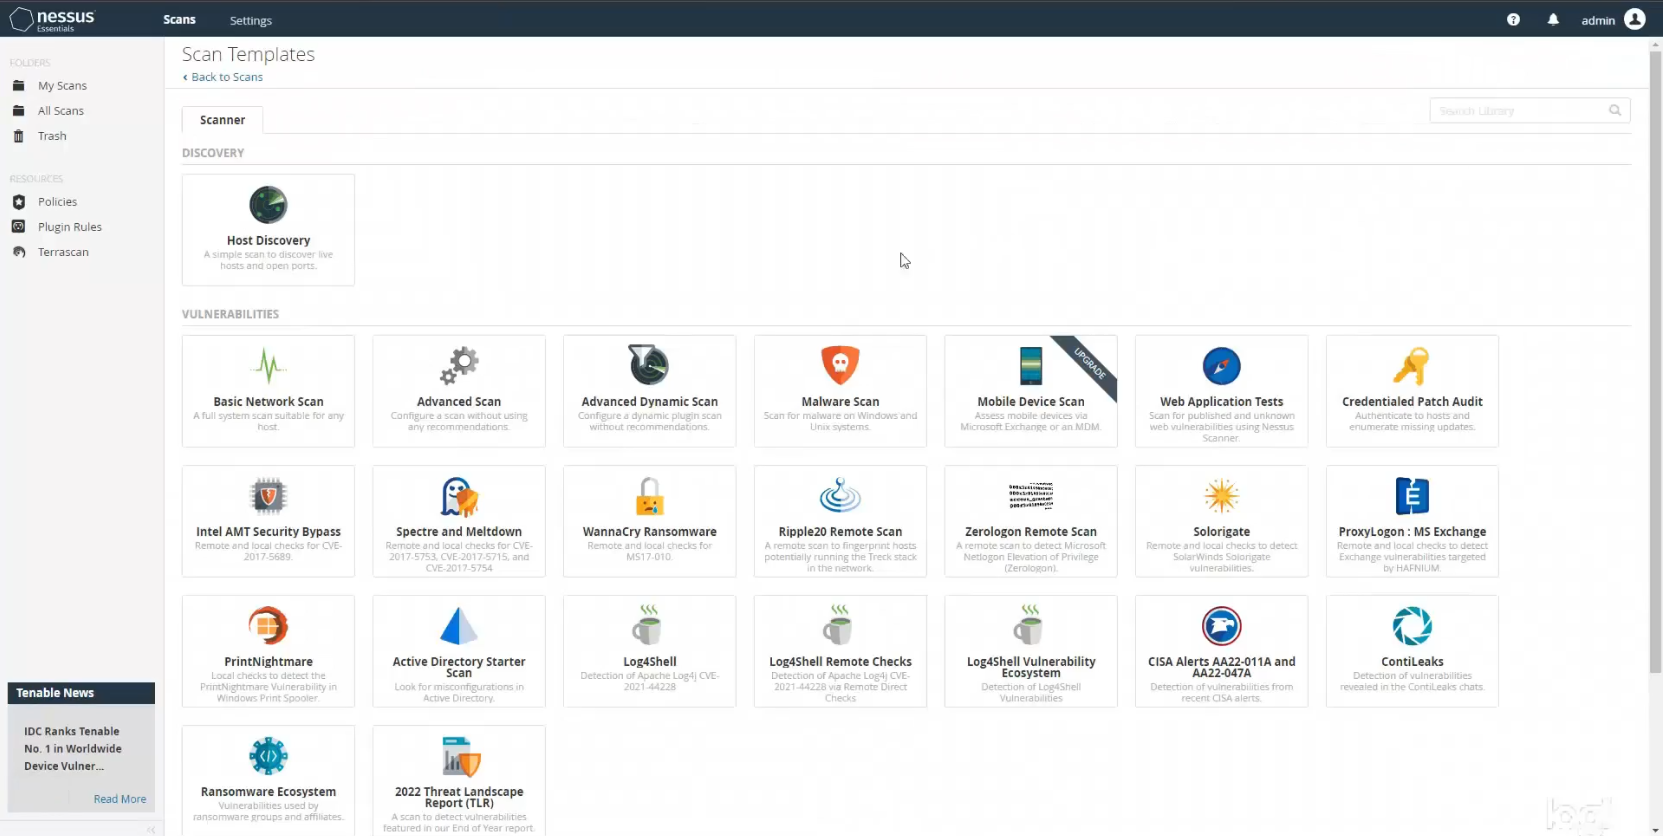
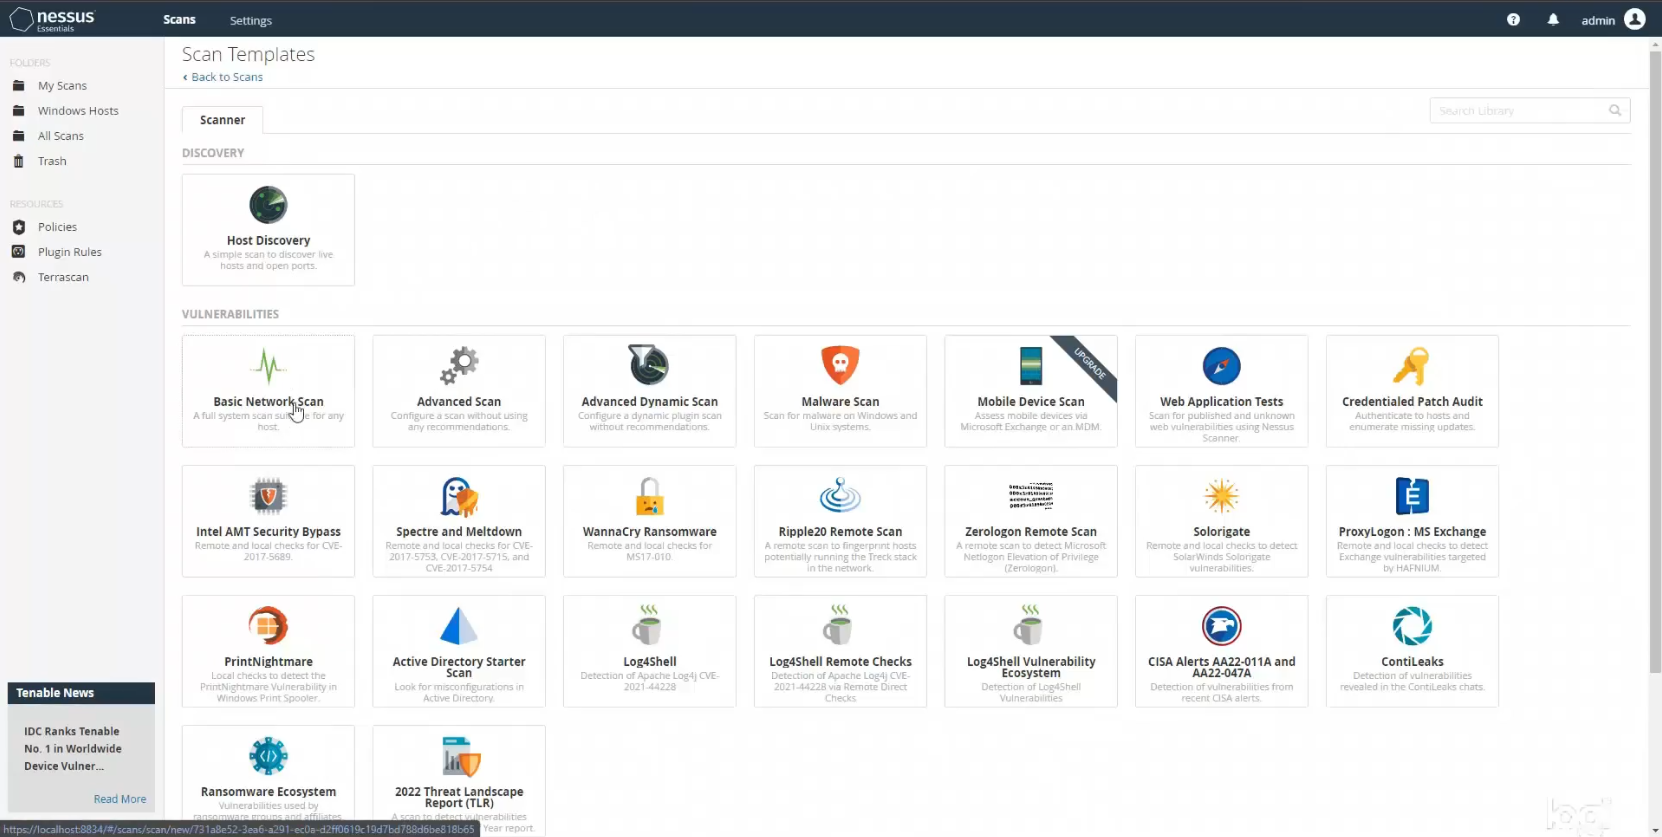
The very first scan I wanted to conduct was a host discovery scan to find all of the hosts on my network. Even though I was only planning on scanning my new VM, I felt that it was good practice to take an inventory of all hosts. After all, you can’t protect what you don’t know you have. Back in the Nessus web app on my main machine I clicked on New Scan from the Nessus dashboard. This takes you to the Scan Templates page where you find a whole slew of different scan templates you could run. Everything from a Basic Network Scan to specialized scans that look for specific types of malware, or even scans to detect vulnerabilities from the most recent government (CISA) alerts. I selected Host Discovery to kick things off.
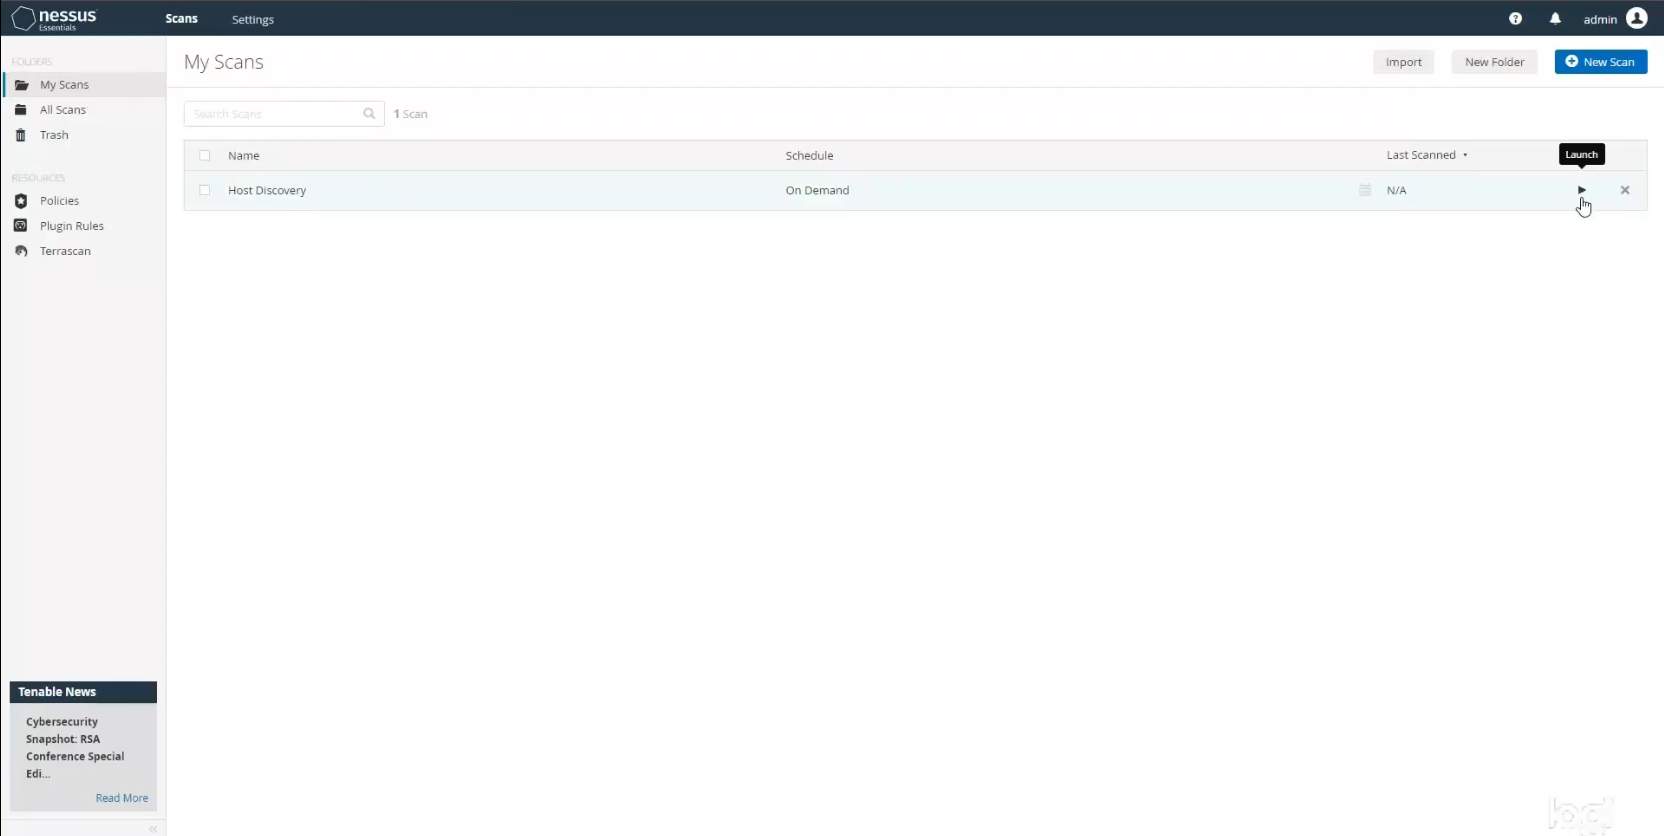
Under the New Scan/Host Discover Settings tab I filled in the name (Host Discovery) and target range for my scan, which was my entire network. Then under the Discovery tab I selected the Host Enumeration option. I left the rest of the default settings and saved my scan. Back in my main My Scans folder I had my new scan ready to go, and clicked Launch.
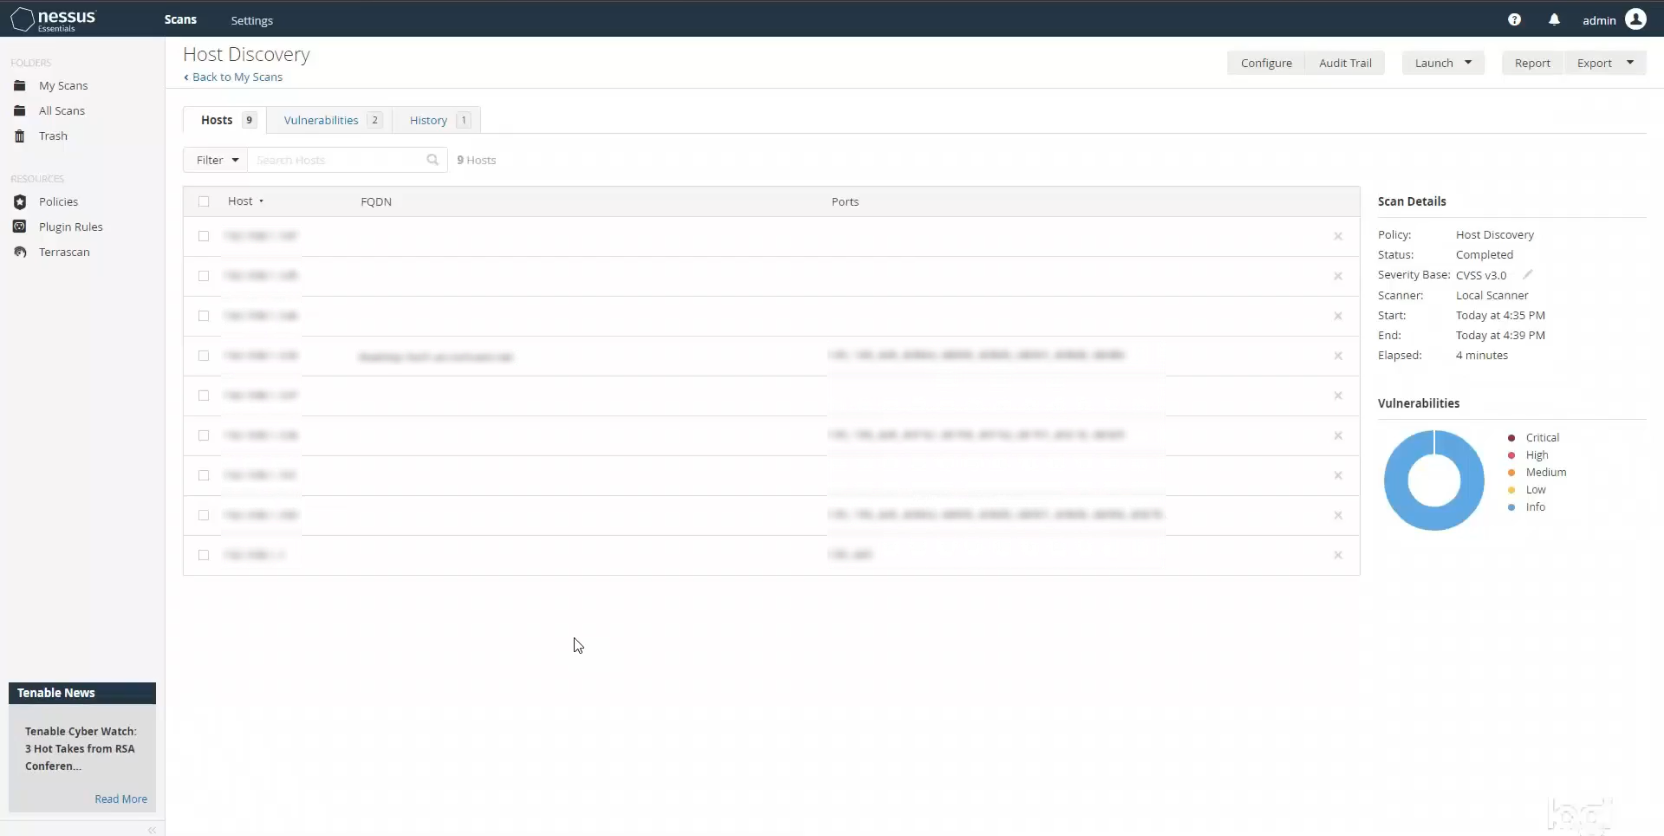
Once my scan finished I clicked on it and saw that it found all hosts connected to my network. Again, this is a very useful scan type to determine what host assets are on your network so you can adequately protect them. Additionally, if you’re unsure what the particular hosts are, you can then run an OS Identification scan under the same Host Discovery scan type. Just choose OS Identification instead of Host Enumeration, and put in the specific IP address of the particular host you’re looking to scan. I won’t be showing that here because I know my VM operating system, but that can be a useful scan type if you’re unsure.
Basic Scanning
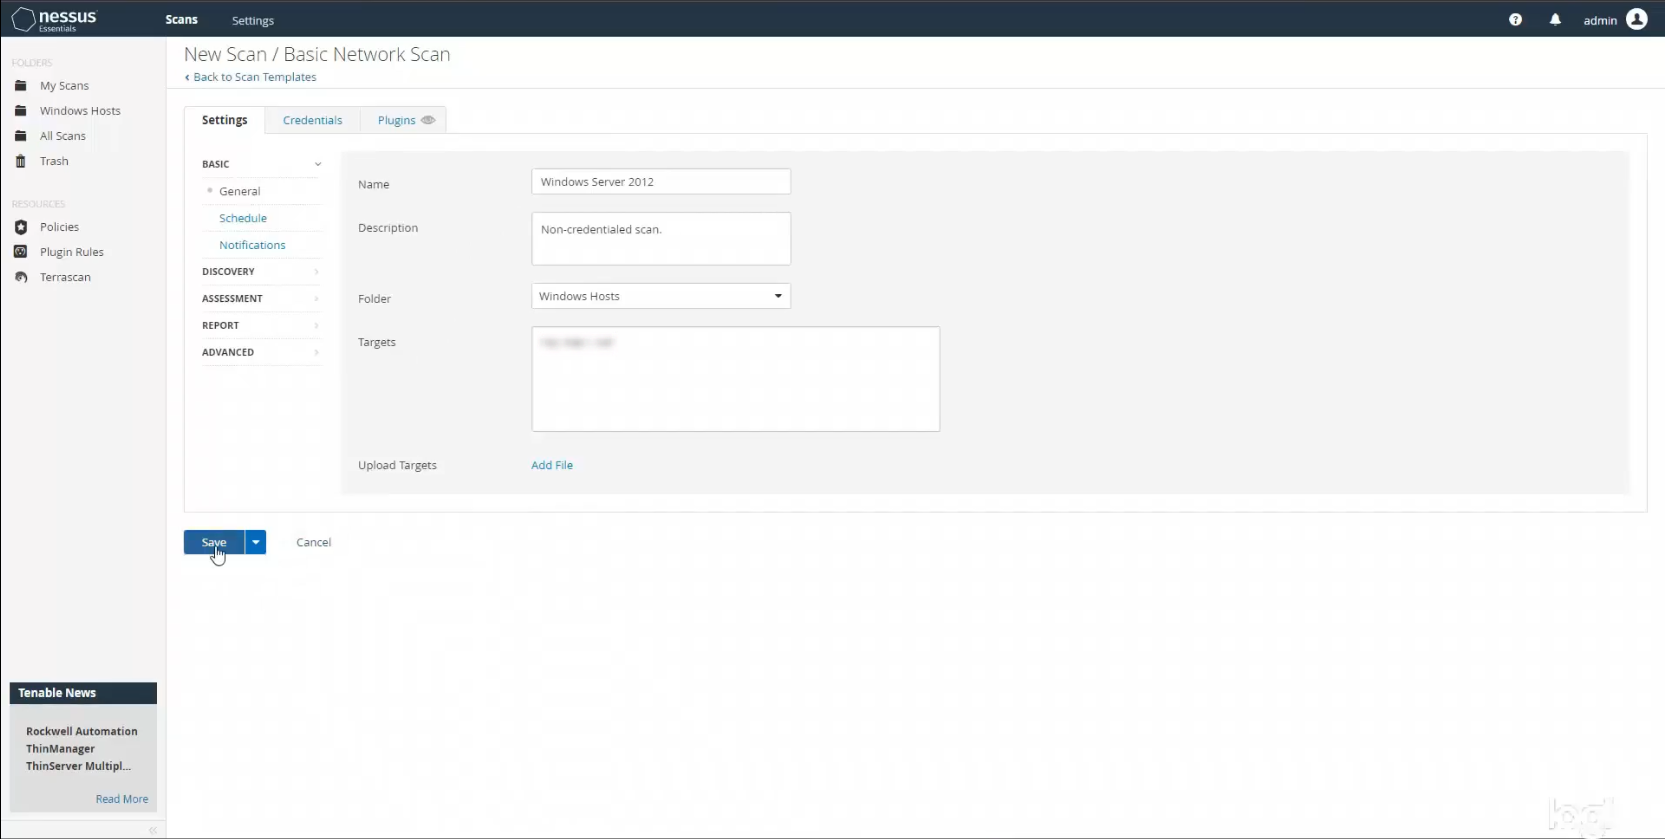
The next step was to run a basic, non-credentialed scan to establish a baseline of sorts. Since the rest of my scans were going to be on a Windows system, I created a new scan folder specifically for Windows host scans called Windows Hosts. Within that folder I created a new scan using the Basic Network Scan template.
This time under the scan settings I input the following information with the target being the IP address for my specific host, the VM that I created. I left all the defaults the same, saved the scan, and then launched it.
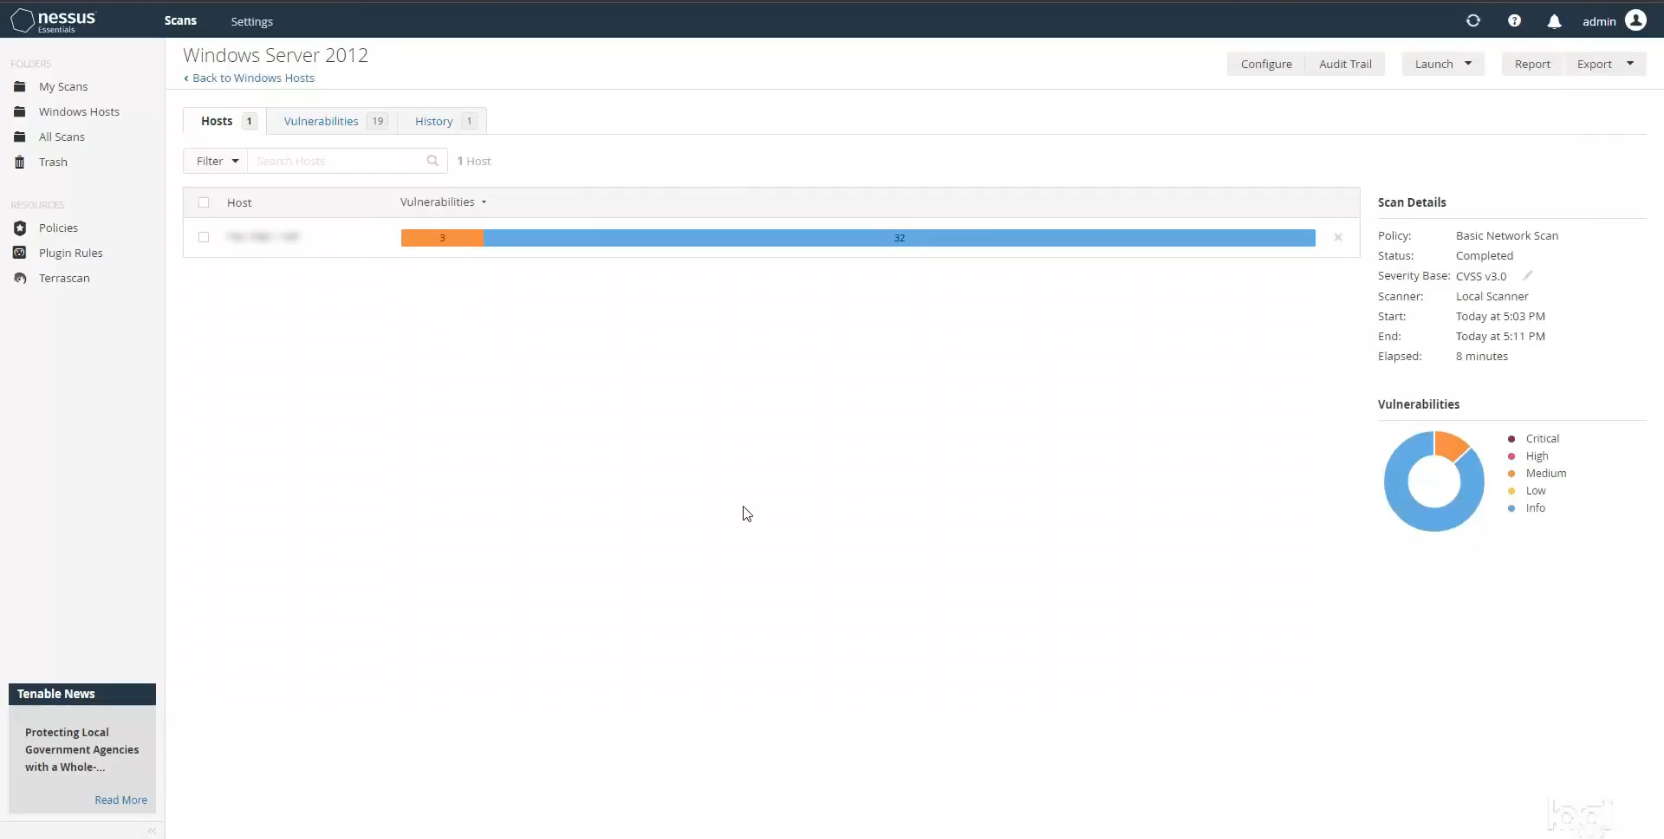
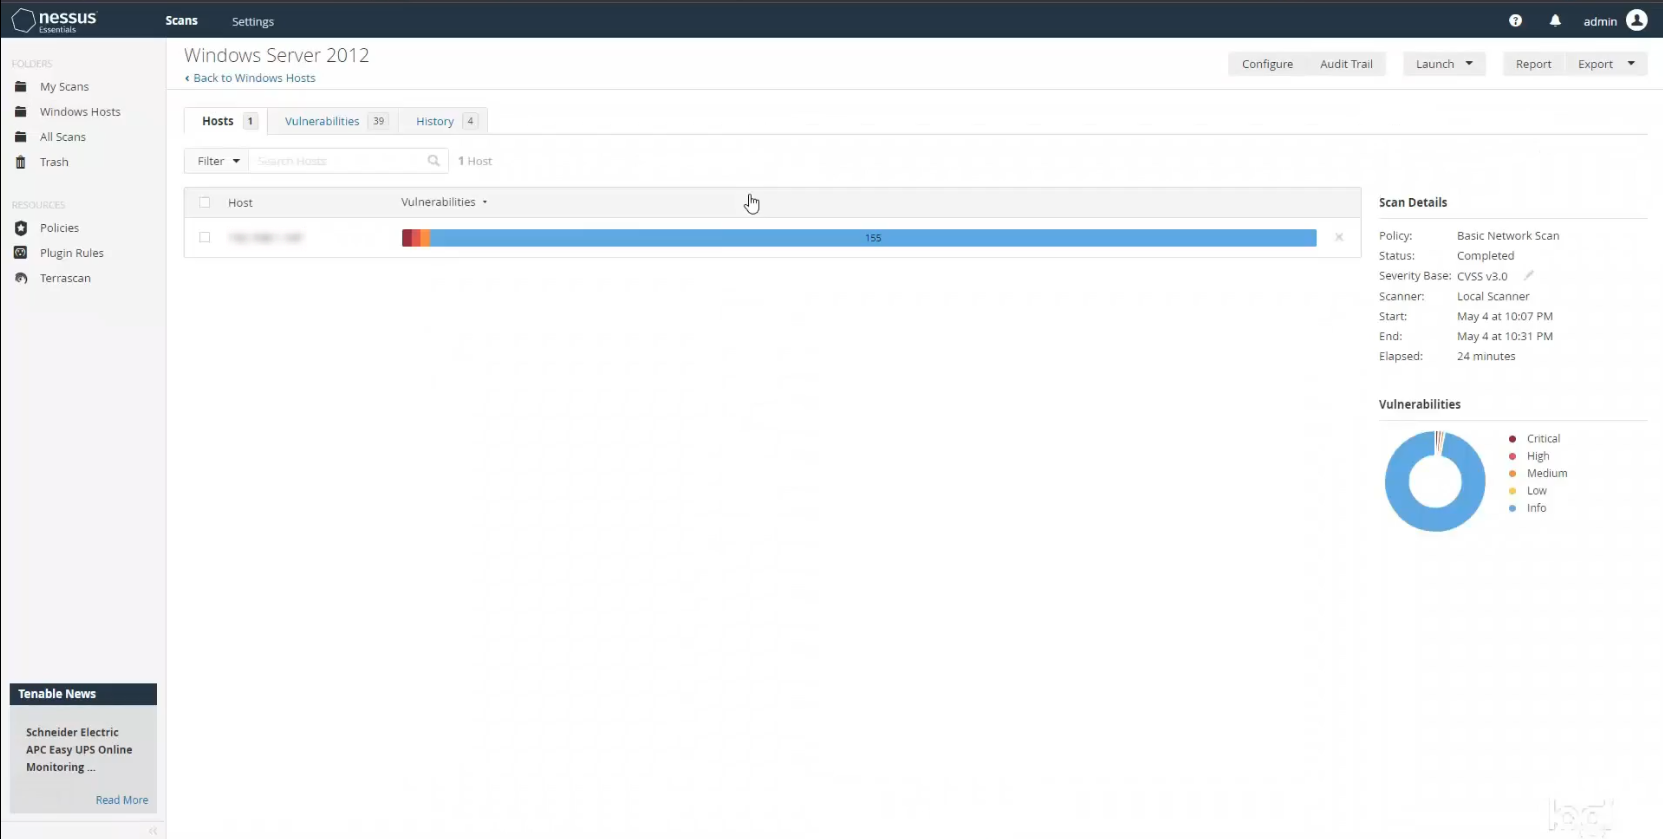
Once the scan finished I was able to start gathering some basic information about my host and the preliminary vulnerabilities I found. By default Nessus uses verson 3.0 of the Common Vulnerability Scoring System (CVSS), which is an industry standard for assessing computer system vulnerabilities. In the donut chart on the right you can see the breakdown of vulnerabilities discovered during your scan, along with a legend describing the different color codings. There wasn’t a whole lot going on (yet) with only 3 medium severity vulnerabilities discovered, and the rest of the items were purely informational.
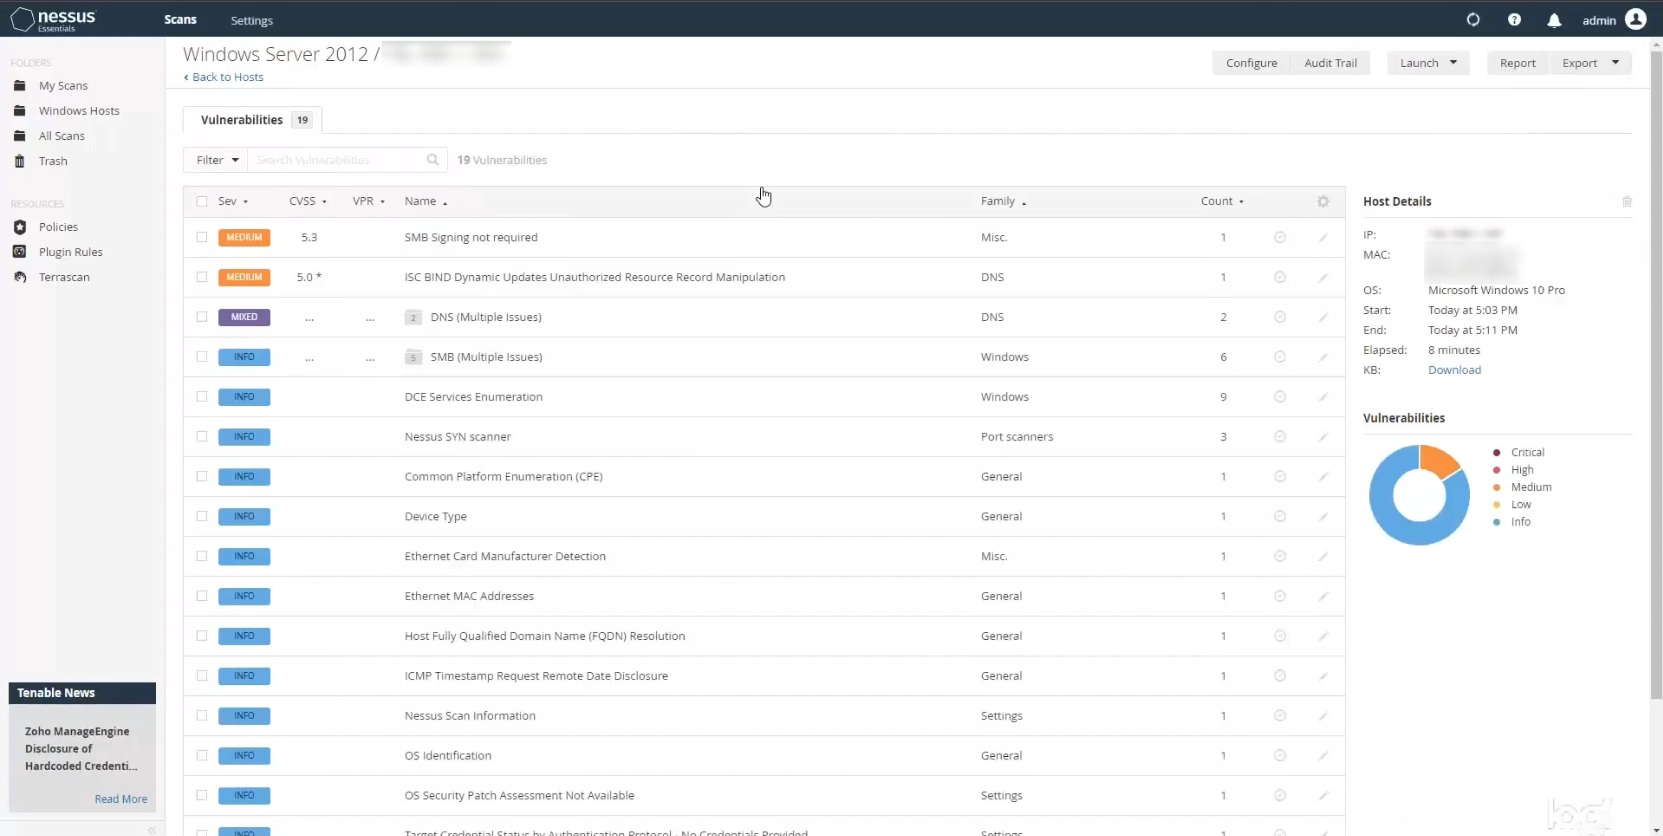
As you can see, when you click on the vulnerabilities you get a list of all your issues, which you can then select individually to find out more information. You can also sort them by severity level or score, name, family, count, etc. Nessus is very useful in that it offers a description of each vulnerability and a suggested solution for you to implement. It also lists a lot of technical and risk information for each vulnerability, including whether there is currently an exploit available, which factors into the severity score.
Running a Credentialed Scan
At this point I decided to dive deeper by running a credentialed scan. Credentialed scans are far superior to non-credentialed scans because they allow you to scan your host at a much deeper level, including the registry and file system. However, in order to run this on my particular host I had to perform a few “hacks” in my VM in order to open up the host for deeper scanning. To do this I followed some instructions I found online from Nessus, although it’s probably not advisable to do something like this in a corporate environment. I’m sure there are better/safer ways of doing it, but for my test VM host I wasn’t too concerned. I won’t detail every step, but the process involved things like enabling the remote registry, making sure network discovery and file sharing are turned on, and adding registry keys to disable remote user account control.
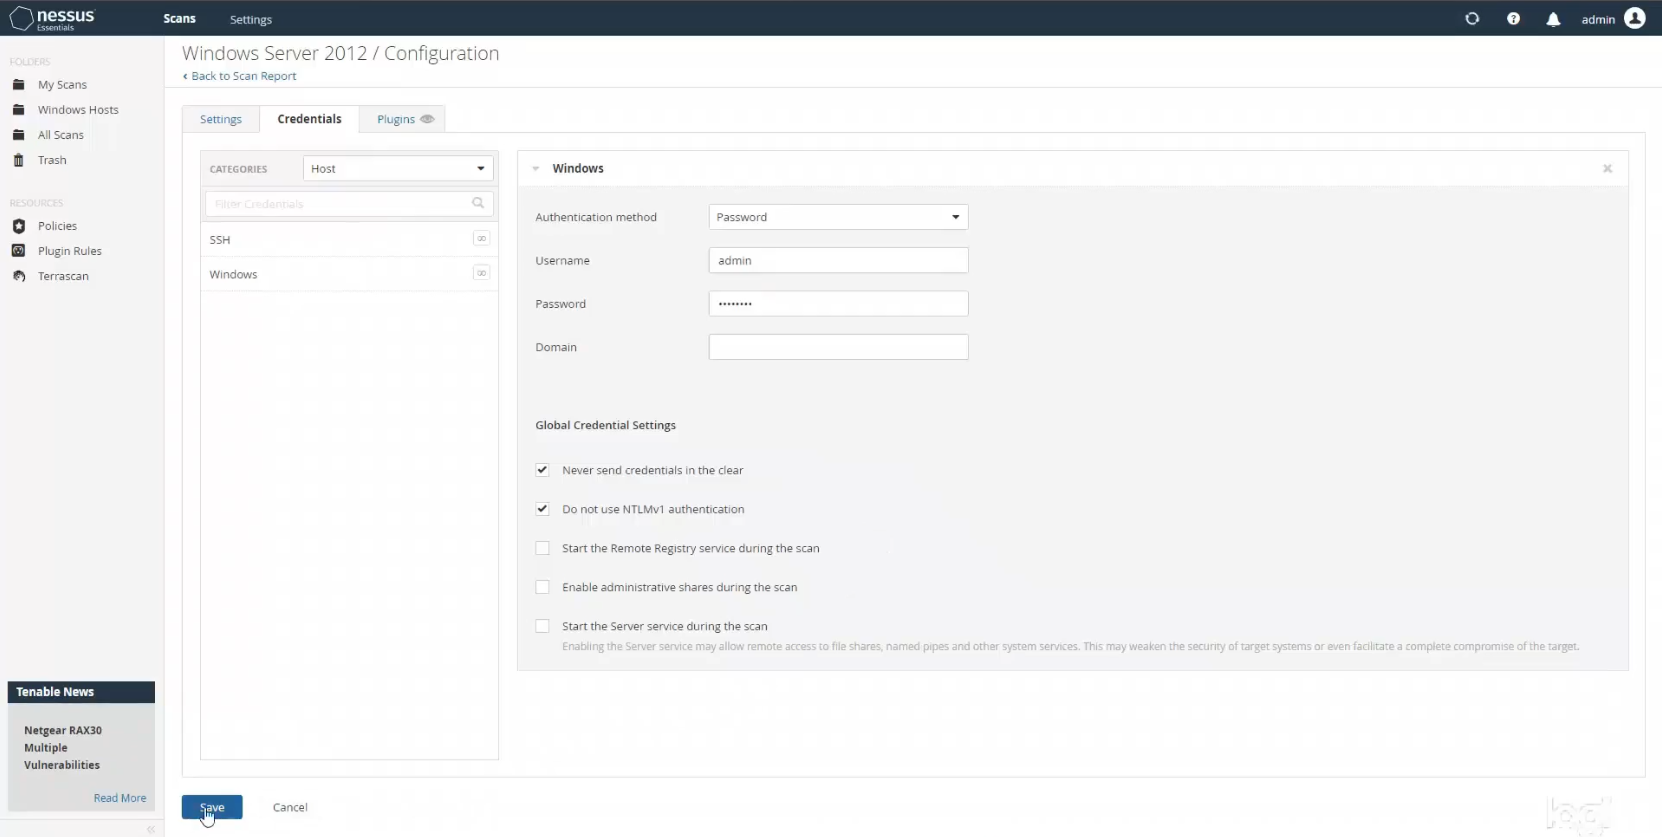
From there I was ready to run a credentialed scan, so I hopped back into the Nessus app in my main machine and reconfigured my prior basic scan to run as a credentialed scan. I left all of the basic scan details the same, but this time I navigated to the Credentials tab, and then selected Windows from the left sidebar. I made sure “Password” was chosen as the authentication method, and put in my username and password for my VM. This allows Nessus to gain access to that host to conduct a much deeper level of scanning. I saved the scan and then launched it.
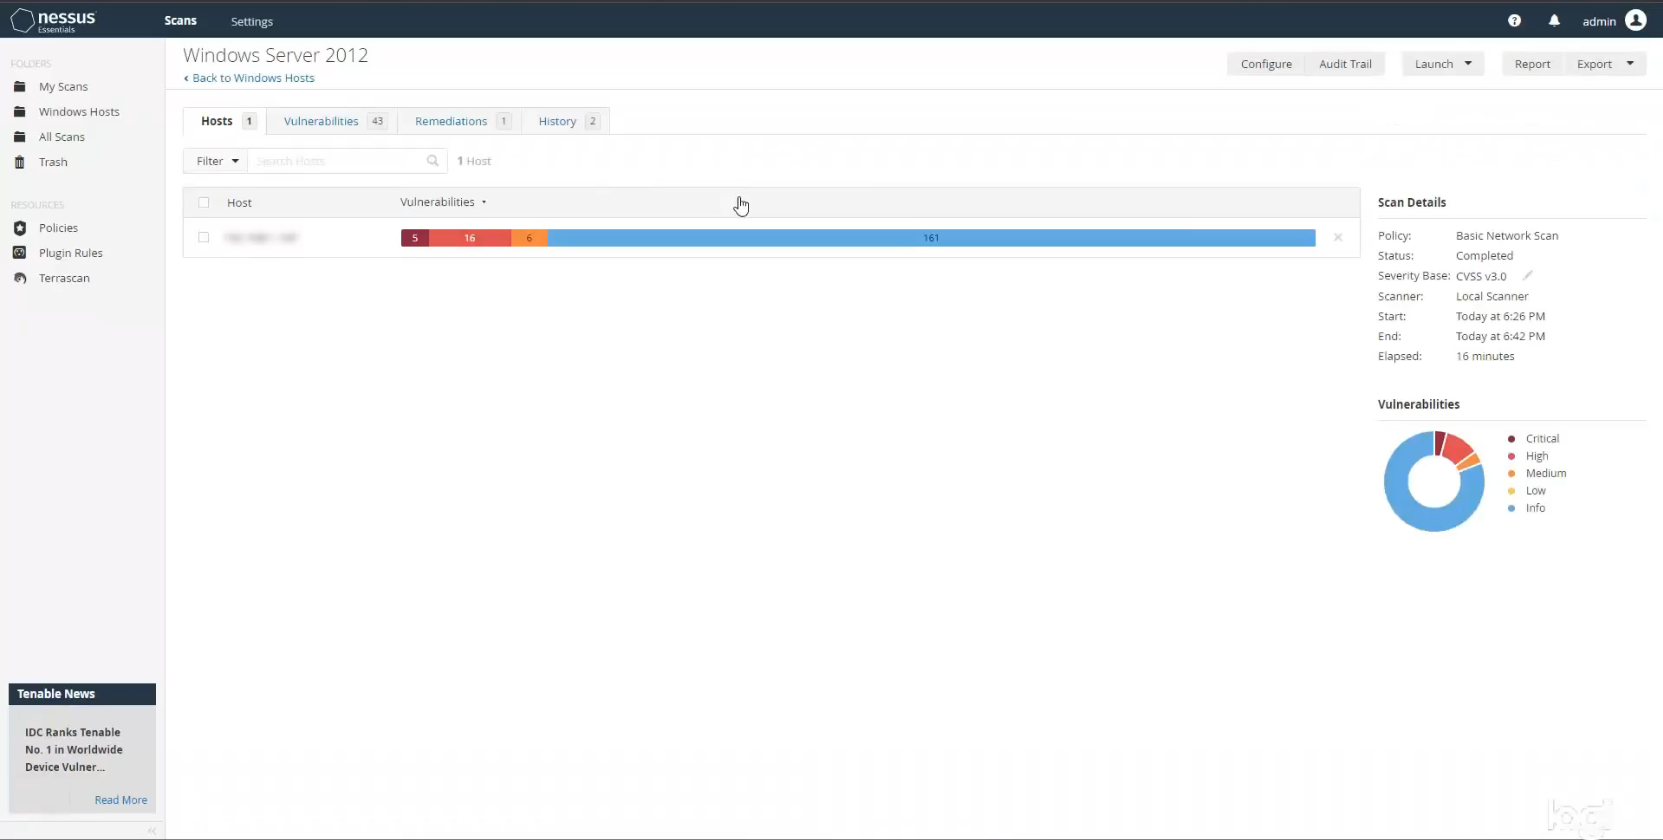
After running the scan I clicked on it to see the results. There are quite a few more issues, particularly of a serious nature. This is the benefit of running a credentialed scan. It will catch things that a non-credentialed scan simply won’t given that a credentialed scan has much deeper host access. We now see 5 critical vulnerabilities, 16 high severity ones, and 6 medium severity ones.
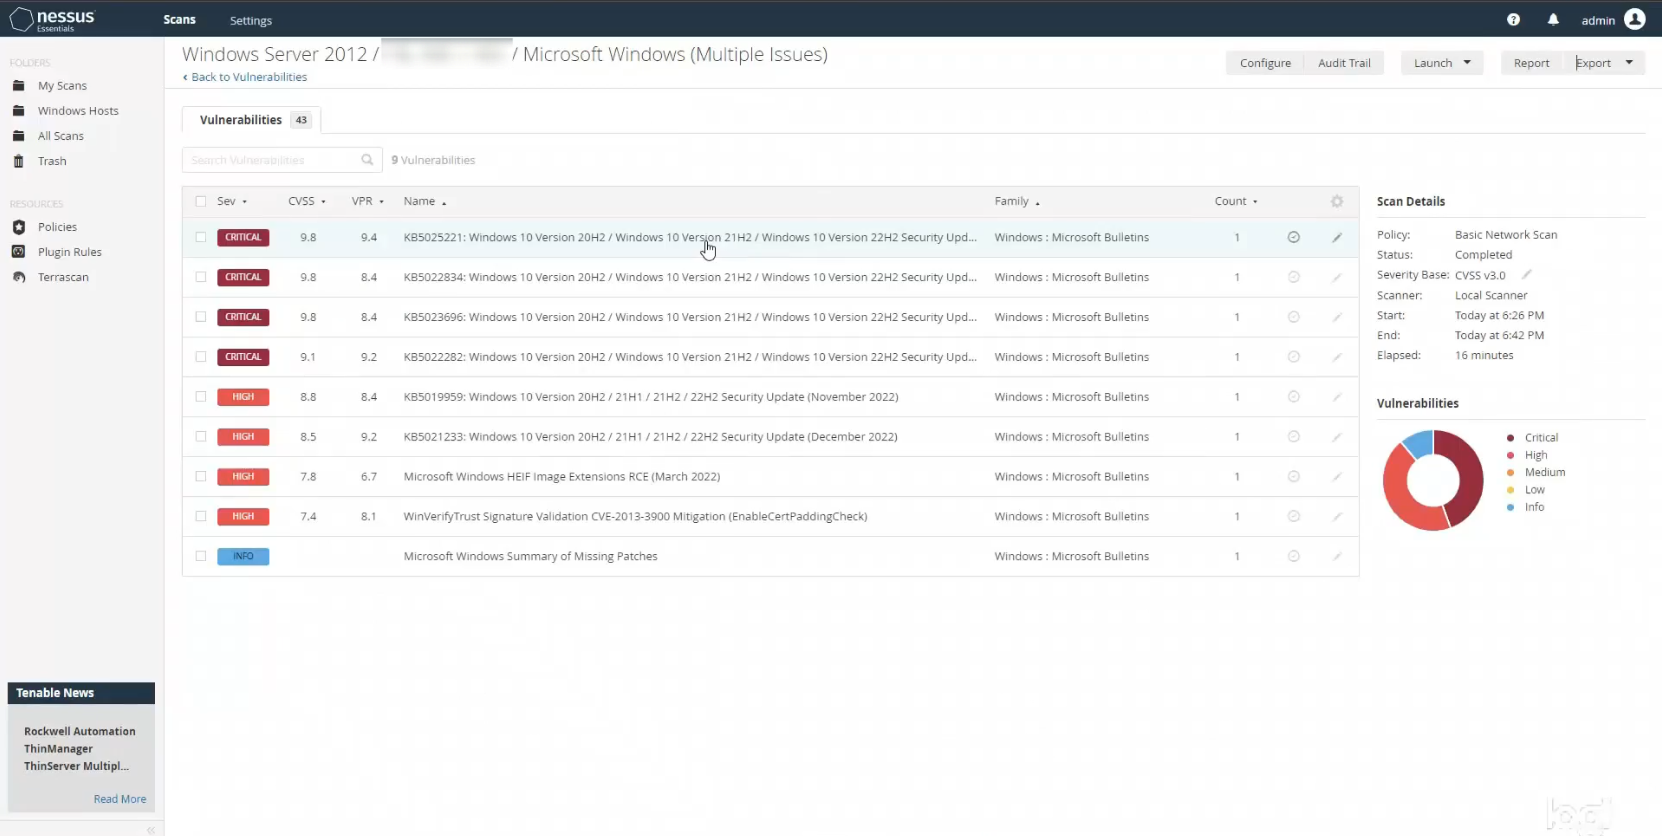
I then clicked on the scan to dig deeper in to the results. As before, Nessus showed a whole list of issues. When I investigated further, it appeared as though the vast majority of them were due to the fact that my VM was running an older copy of Windows 10 that had not been updated yet. I purposely chose not to run security updates when I installed the OS. This was to show the number of issues present when you don’t keep your operating systems up to date with the latest patches, and also to give me some things that I could easily remediate.
Installing an Ancient Web Browser
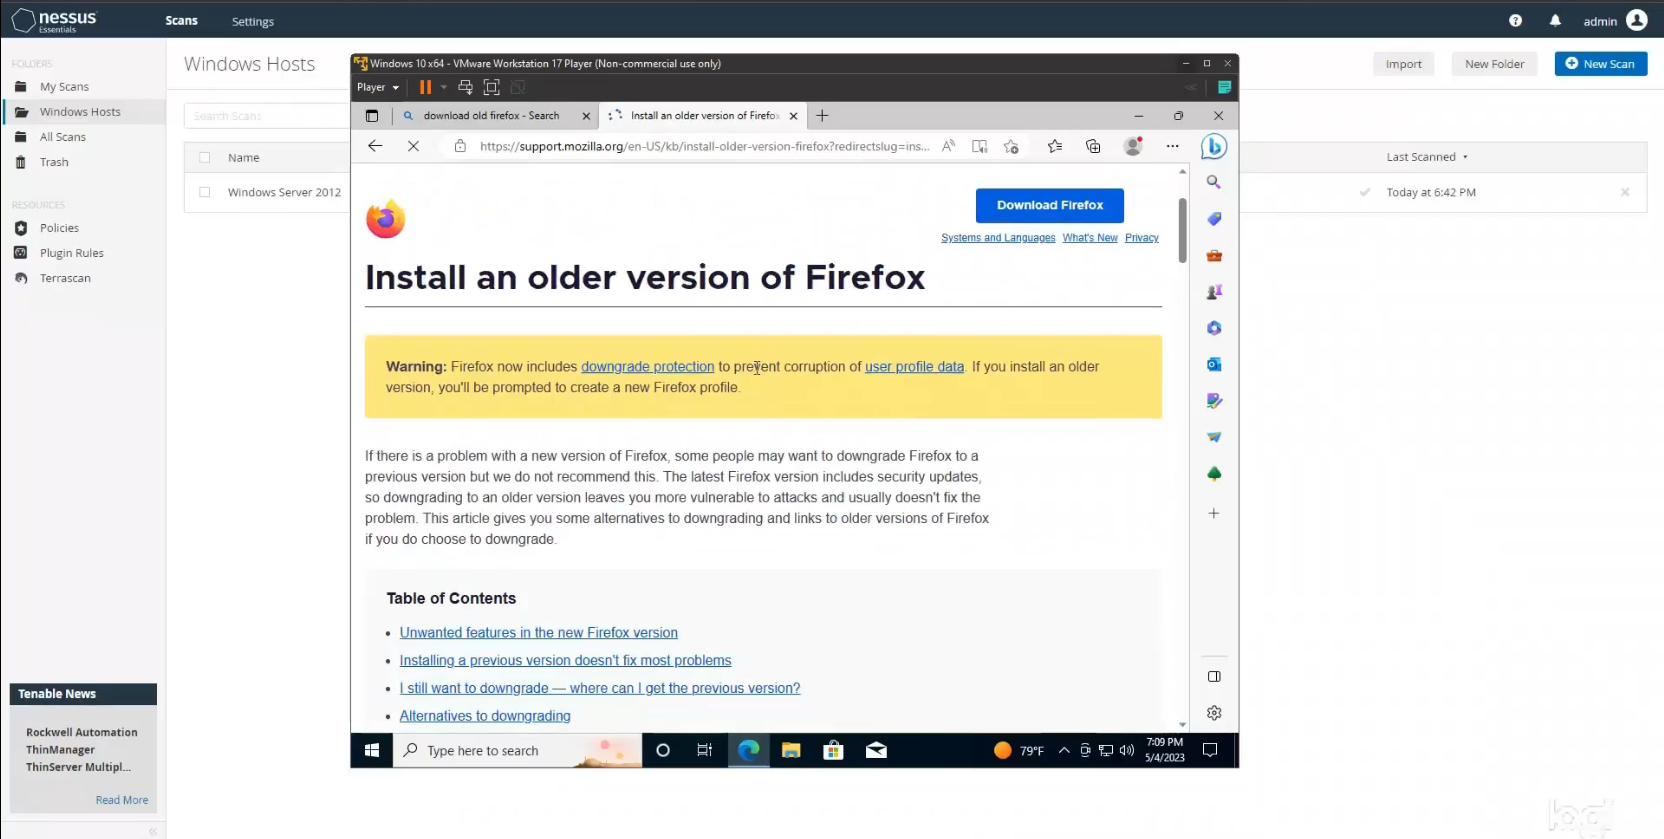
The next thing that I wanted to try was installing an extremely old version of the Firefox web browser onto my VM. Obviously I wouldn’t recommend doing this in a working environment, but in a test environment I figured it would be interested to see just how bad it would be to run a super old browser version. So I went ahead and installed a version of Firefox from the stone ages.
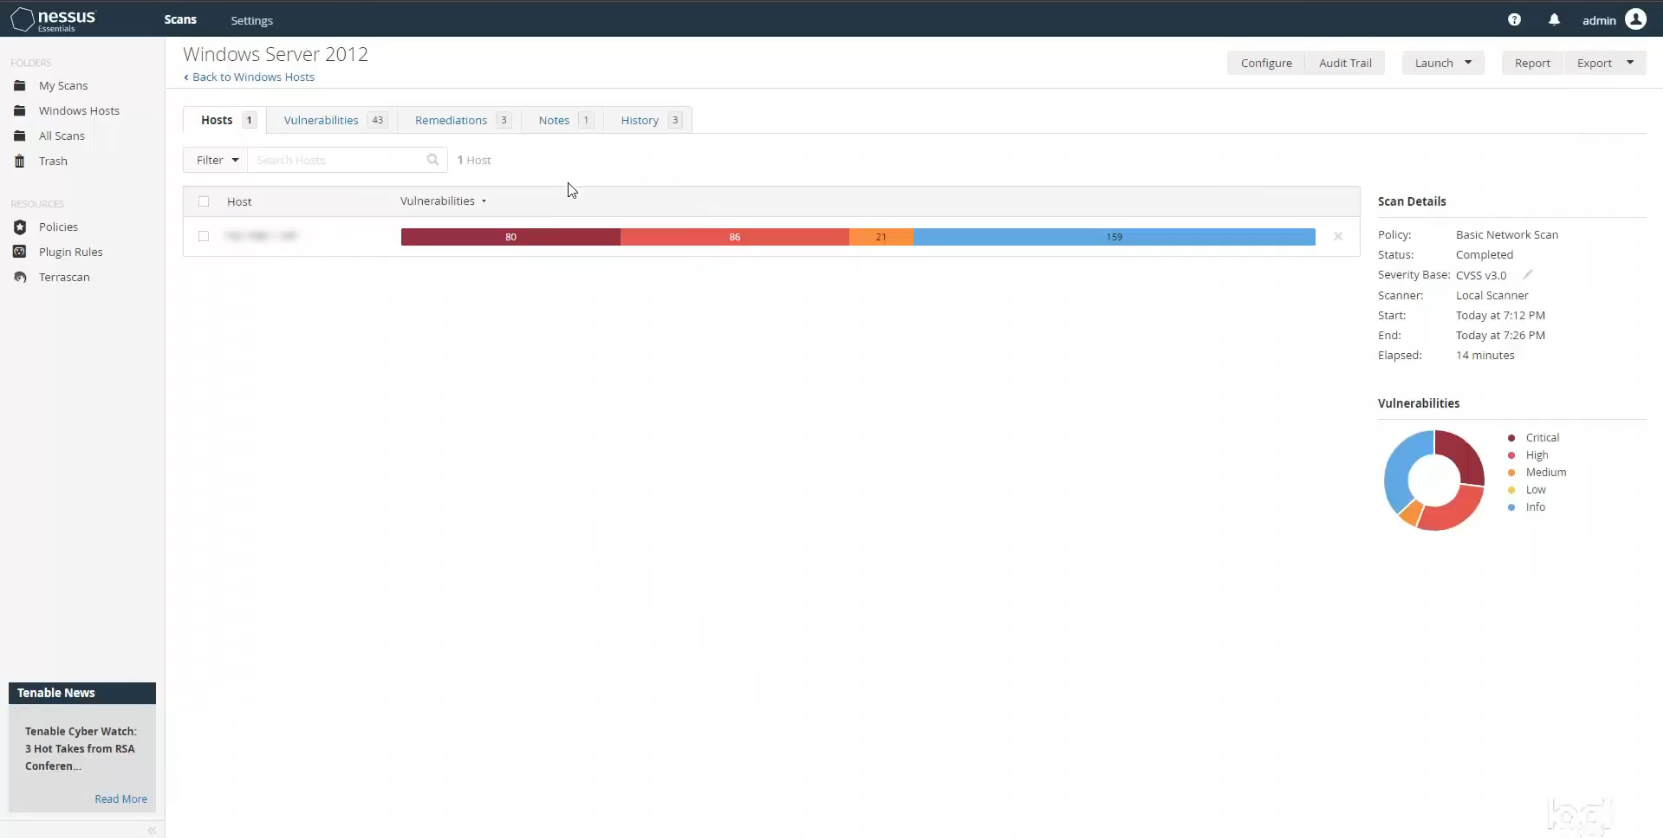
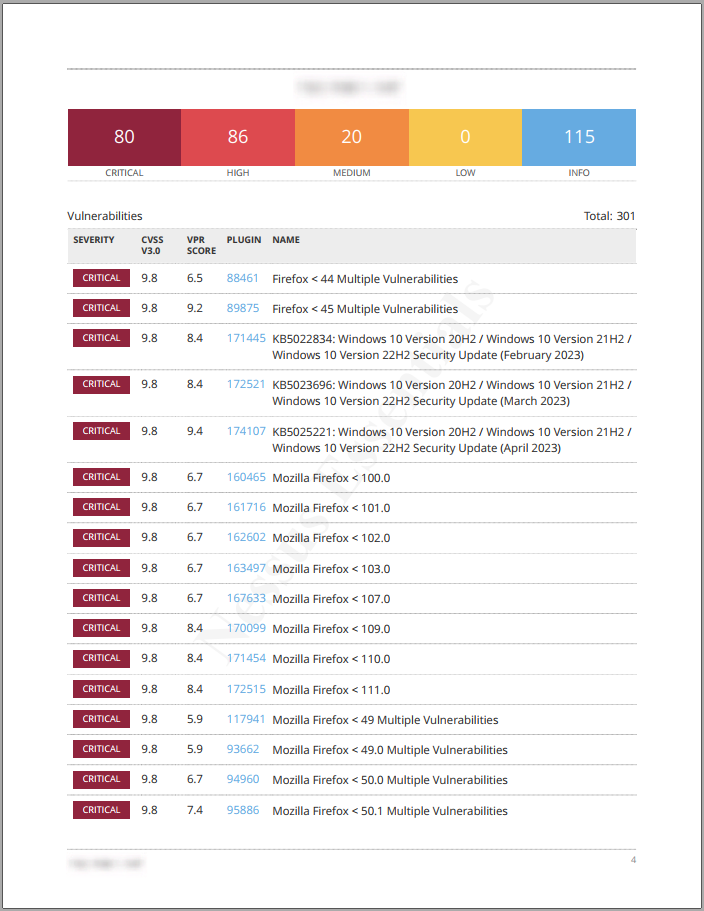
After installing old firefox on my VM, I went ahead and ran another credentialed scan on that host to see how much worse things would be. The results did not disappoint! I ended up with 80 critical vulnerabilities, 86 highs, and 21 mediums.
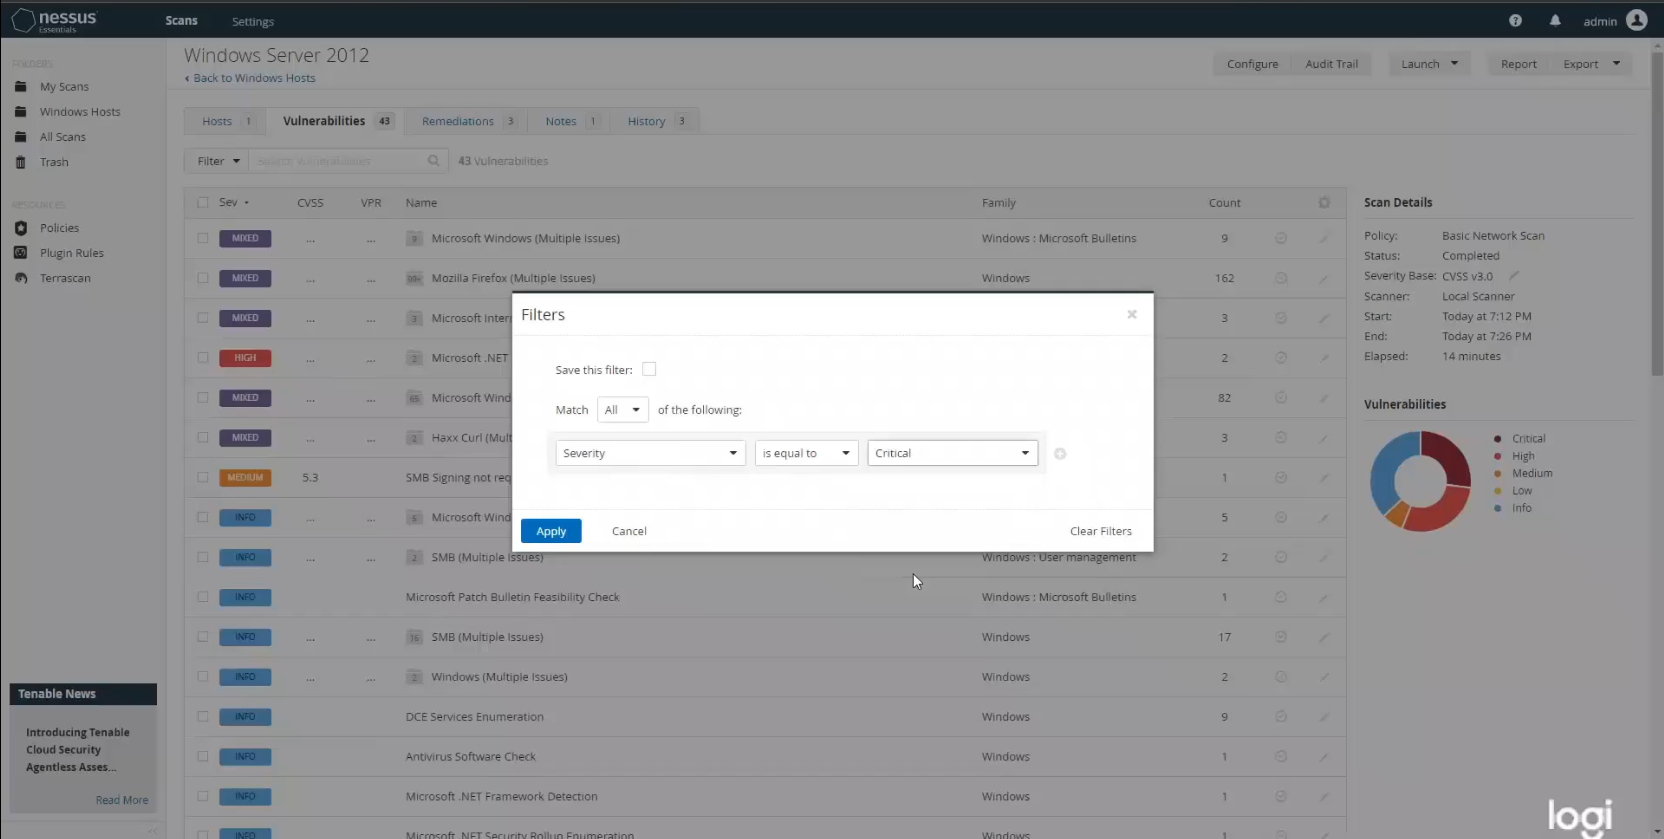
I also took the opportunity to play around with result filters. In addition to filtering the order of the results based on different factors, Nessus also allows you to only show specific results based on a wide variety of filter criteria. This is useful if, say, you only want to view results with a severity rating of critical.
I also wanted to practice reporting on my scans, so I generated a complete list of vulnerabilities by host. After exploring the different report types, this one seemed like a good high-level executive report that one could give to a higher up to keep them informed of the big picture with regard to vulnerabilities on a particular host. This report type generates a comprehensive, yet relatively simple report detailing all of the vulnerabilities found, their severity and criticality scores, as well as links to the Tenable database showing more in-depth information on each particular vulnerability. Very handy.
Remediation Time
At this point I decided to practice remediating vulnerabilities. My plan was to first uninstall Firefox (although updating it would have worked as well), and then updating Windows and applying all of the security patches. This process took awhile because I had to download and install the updates, restart my VM, check for more updates, and keep repeating the process until there were no more patches to be applied. After doing all of this I ran one final credentialed scan to see how many things I fixed.
Not too shabby! The results showed only 3 vulnerabilities: 1 critical, 1 high, and 1 medium. This is a massive improvement over the last scan when my host was like Swiss cheese with all of the security holes. The remaining issues were relatively minor things, with the exception of the 1 critical, which simply required dealing with an outdated Internet Explorer browser.
This goes to show how important it is to stay on top of software patches and to provide end-of-life service for deprecated software that is still being used. It is also extremely important to harden your hosts before bringing them onto the network. This means applying all necessary security patches, software updates, and ideally disabling ports and other potential attack vectors that will not be used. Automating the vulnerability scanning process is also useful for streamlining everything and staying on top of potential vulnerabilities. I did some labs with Qualys’ Vulnerability Management Detection and Response (VMDR) tool and learned that it can be configured to apply patches automatically. Very cool.
Final thoughts:
All-in-all, this was a fun lab that gave me some valuable experience conducting vulnerability scans using a popular scanning tool, Nessus. I also learned how to set up and configure virtual machines, which is something I had never done before. I know there is much more to learn in terms of configuring custom scan types and really diving into the capabilities of Nessus as a vulnerability scanning tool, but this was a good introduction to the process!
